Building a blog with Fastify, SQLite, and zero frameworks
Why I built my blog with Fastify, SQLite, and server-rendered templates instead of Next.js and Postgres. The stack, the trade-offs, and why boring tech won.
If you use SSH regularly on macOS, configuring 1Password as your SSH agent is a nice upgrade. It keeps your private keys encrypted, avoids long-running agents loaded with keys, and requires you to explicitly approve each connection.
This post walks through the minimal setup.
That’s all that’s required on the 1Password side.
You can either:
The private key stays inside 1Password and is never written back to disk in plaintext.
Edit your SSH config:
# ~/.ssh/config
Host *
  IdentityAgent "~/Library/Group Containers/2BUA8C4S2C.com.1password/t/agent.sock"
This tells OpenSSH to use 1Password’s agent socket instead of the default ssh-agent.
You don’t need to remove or disable the system agent — SSH will use the one specified here.
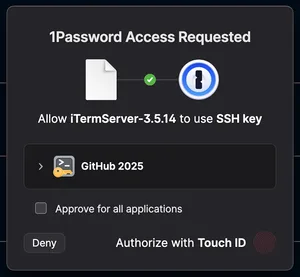
The next time you run something like ssh foo@bar.com 1Password will prompt you to approve the connection. Once approved, the SSH connection proceeds as normal.
This works well for Git operations, servers, and any other SSH-based tooling.